Most stores do not need more broadcast blasts. They need a code that fits one person, one moment: a new signup, a buyer who just checked out, or someone who has gone quiet for months. When the code is one-time or short-lived, you get less sharing on deal sites and a clearer read on whether the email actually moved the sale.
ActiveCampaign tags are a simple switch for that. Add a tag when something happens; Coupon Carrier hears it and drops a unique code into a contact field; your automation waits until the field is filled, then sends the email. This post covers the tag -> wait -> send pattern and three setups you can copy.
Tags in ActiveCampaign are just labels you attach when a contact does something (or when an automation decides they belong in a bucket). Coupon Carrier can listen for a specific tag and write the code to a custom field. Your job is to never send the email before that field has a value.
That order of operations gets you a few practical wins: single-use codes instead of one leaky code for everyone, optional expiry windows if your store supports them, different tags for different segments so the same discount is not blasted to your whole list, and no custom code on your side, just ActiveCampaign plus Coupon Carrier.
Below is the flow we recommend. For the full product walkthrough, see Getting started with ActiveCampaign in the docs.
In Coupon Carrier, create a Code Email configuration, connect ActiveCampaign, and set the trigger to "Trigger when a tag is added to a contact." Use a tag name you will recognize later (e.g. add_welcome_code).
Point the configuration at a custom field where the code should land (e.g. COUPON).
In ActiveCampaign, add actions in this order at the point you want the offer to go out:
add_welcome_code).Custom contact fields > COUPON (or your field) is not blank. That pause is what keeps merge tags from firing empty.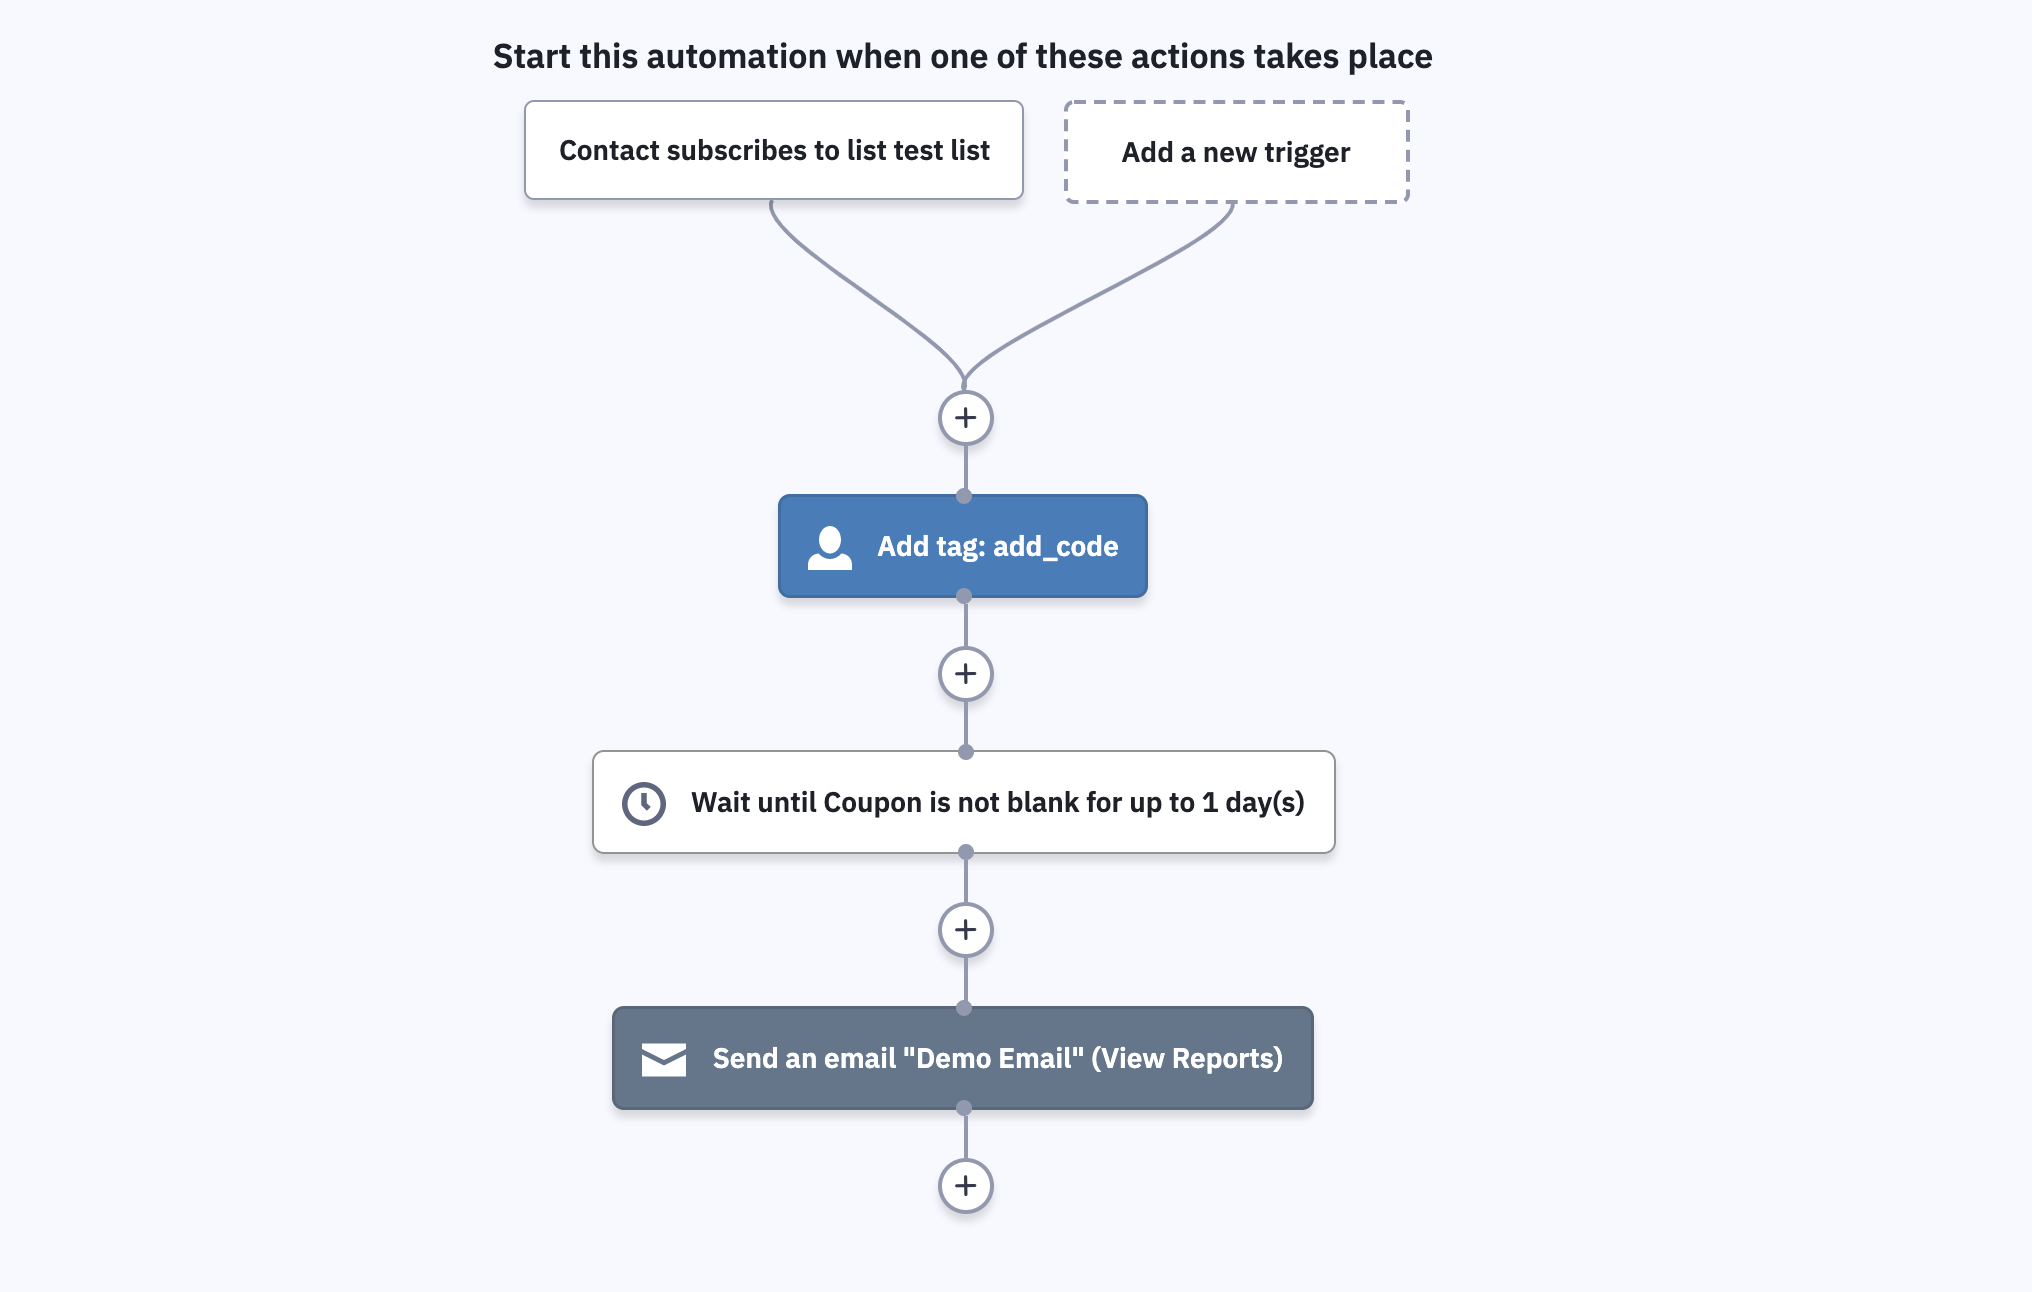
In the email builder, drop in the personalization for that field (e.g. %COUPON%) wherever the code should appear. ActiveCampaign substitutes it from the contact record when the message sends.
Tag new subscribers after they confirm (or after they join the list, depending on your policy) and send a one-off welcome code with a clear end date in the copy.
Using %FIRSTNAME% in the subject or first line is enough for most welcome emails; you do not need a novel in the preview text.
After an order, apply something like add_thankyou_code so the same tag -> wait -> send pattern fires with a "thanks, here is a next purchase" code. This ties naturally to e-commerce flows if Shopify or another cart is in the mix.
For contacts who have not opened or clicked in a long window (90 days is a common starting point), a dedicated tag (e.g. add_winback_offer) plus a short-lived code can be worth testing before you sunset the address.
If you already segment with tags, wiring Coupon Carrier to those tags keeps discounts per-person without spreadsheet gymnastics. The integration page lists triggers and field mapping in one place.